Follow this blog with bloglovin

Follow on Bloglovin

Followers

Please respect my

All work exhibited here is my own design, unless otherwise stated, in which case I shall have credited the original author of that work. I am thrilled to be able to share my designs with you but would appreciate that you respect that these are my designs and do not copy and place them anywhere else online or use them for your own personal gain in any way.


Google Website Translator Gadget

Friday, 12 November 2010

More Sheena on the Way + A Tale of Woe!

It's been a week of mixed blessings. I recently took delivery of some more stamps from Sheena Douglass, so watch this space in the coming week for some sneaky peeks. There is something in there for everyone, even the men in your life!!

I should have been getting on with them this morning, but as my friends over on Craft Telly know my Daughter was assaulted at work yesterday and thrown ten foot across the bar into the stage area. The poor little love is having difficulty walking today and has bruises on her bruises on her hip, back, buttocks, one arm, back of her neck and down the outside of one breast. The Doc has told her to expect to be very sore for two to three weeks. I hardly got a wink of sleep last night worrying what might have happened, and have been awake since 4am. I am just about done in and am back to bed in a bit. Now I know that she hasn't broken anything I might be able to catch up on a bit of sleep.

This is typical Ems, she stepped in because the Landlady was about to get her head stoved in with a barstool and found herself flung across the bar for her trouble by a hulking great man. Shame on him!! She was always the one getting picked on at school because she stood up to the bullies who were making the smaller kids' lives a misery. I guess I would rather have her that way than look the other way and pretend that someone isn't being hurt, but it frightens me what could happen when she acts all Xena Princess Warrior in someone else's defence!

I do have a bit of good news to share, but I will delve into that later, when it has been announced and I am feeling a little more human. 

Anyhow, I shall post my sneaky peeks towards the middle of next week, so keep an eye out!

Tuesday, 2 November 2010

CCM 33 Stitching

CCM 33 - Stitching - Card Apologies if anyone was looking for this yesterday, but for some reason all day yesterday I thought it was Sunday, that’s what gaining an hour will do for me! LOL

This fortnight we are concentrating on stitching over at Crafty Cardmakers. Now that could be faux or real, and the real could be machine or hand, you could stamp your stitches or rub them on. Simple or complicated, you choose. We are sponsored by imagewho is offering a £10 voucher for use anywhere in her store, which is also post and packing free. 

I went with hand embroidered rather than stitched I guess, as I just love stitching on my cards and would do much more of it were it not quite so time consuming.CCM 33 - Stitching - Stitching So my first step was to choose a design and then how I wanted to use it. I went for these borders mirrored top and bottom. I had intended to use them left and right, but when it came time to stamp an image I chose one that needed to be horizontal so just had them top and bottom instead.

So having printed and pricked the design and stamped my image I then coloured it in with promarkers, and after that chose my threads to match the colours in the image. If I had been going to use patterned papers I would have picked them at this stage too because trying to match everything after you have stitched can be a nightmare and it’s impossible to change the colour of your stitching once it’s done, so much easier to do that last to match everything else.CCM 33 - Stitching - Image I matted it onto some bluebell coloured paper which I cut to size and trimmed with my MS doily heart punch.

I chose plain colours for this because I thought the image and stitching were pretty enough without the need for patterned papers.  CCM 33 - Stitching - Angle I made the embellishment myself from some ribbon and thread and a couple of flowers and a heart pin which I coloured with some cheap kids’ dimensional paint, as it was the wrong colour and I found that promarkers didn’t want to stick to it. A few self adhesive gems in the centres of the stitched circles completed my card. CCM 33 - Stitching - Flower Do pop on over to Crafty Cardmakers and catch up with my teamies’ creations and, of course, enter the challenge for that great prize.

I am entering this into the following

A Spoon Full of Sugar – Relish to embellish – my home made embellishment above

Creative Card Crew – Let’s Punch It

Simon Says Stamp – Punch ‘em

4 Crafty Chicks – Roll With The Punches

Wee Memories – Free For All / Anything Goes


Butterfly 2 Signature Lin

A Few challenges and a DT call

02.11.10 Card

Donna at Bearly Mine Designs is looking to expand her Design Team and I am entering this card.

Like my post last week for Crafty Cardmakers I am using some of Donna’s gorgeous ‘FREE’ papers as the basis for my design.

I chose three that matched beautifully and used them to make this easel.

The image is from Sheena Douglass and I stamped it and embossed it with her Sheena Wow platinum sparkle embossing powder and then coloured it with cosmic shimmer paints. 02.11.10 Image The only paper that isn’t from Bearly Mine is the aqua coloured paper at the very back of both the image and sentiment mats as I wanted something to make the image pop off the card a bit more.02.11.10 Angle The ribbon is from my stash and the flowers I made by dismantling some Wild Orchid flowers and spraying them with Glimmer Mists in Timeless Lilac and Touch Of Mica in Purple. I also sprayed some plain white flowers with the Glimmer Mists and another larger flower I smeared with versamark and embossed with the Sheena Wow Powders again, and I did the same with the flourishes on the top of the card as I wanted some glitter but not too bright like mirri would have been. 02.11.10 Flowers I went for some simple butterflies for the top of the card as there are some gorgeous colours/patterns in the papers and I wanted them to be able to be seen. I did just ground round the top sheet’s edge with a white gel pen though to match it in a bit to the design on the lower sheet.02.11.10 Sentiment I have stuck a row of little purple gems as the prop to make the easel stand and made my own sentiment from a quote I found online and using two different fonts turned it into a birthday quote as this is going to be a birthday card for a friend. Another flourish which I sanded down from mirri and another flower finishes it off.

I am also entering this into the following challenges:-

Colour Create – The colours purple, aqua and white with the optional extra of swirls.

ABC Challenge Blog – G is for Glitter

Papertake Weekly – Sparkly and Bright

Lexi’s Creations – Anything Goes

Bearly Mine Designs – Design Team Call

Butterfly 2 Signature Lin

Monday, 25 October 2010

CCM Spotlight – Digital Plus

32 Digiplus WM
I have had a very frustrating time trying to get my Crafty Cardmakers’ Spotlight done for this week. I had in mind what I fancied doing, as Halloween is on Sunday,  but lacked the materials to do so. I ordered myself some printable inkjet shrink plastic from Crafty Computer Paper, but it didn’t arrive and it didn’t arrive. Eventually I telephoned them, but after they told me they had posted it a few days before and no sign of it they very kindly helped me out by mailing it out via courier to me at no extra cost so that I could get my Spotlight project finished and blogged on time. Big thanks go to them from me….. Big whinge to Royal Mail as the original parcel still hasn’t turned up! Do you think my Postie might be a secret crafter? Have to say, by the way, that this is the nicest shrink plastic I have ever used. There was no hint of it getting tangled on itself, like I have found quite a lot do, and it gave me a finished product I was really pleased with. It dried beautifully and was easy to trim out too.

To add insult to injury my printer decided that last week was a good week to have it’s swansong and to start spitting out great big blobs of black ink over everything I printed, which made getting a decent digital image out so that I could even colour it a ruddy nightmare. Thank you printer for conspiring against me!

Anyhow enough of my moaning. Onto the project. So this fortnight we are concentrating on doing something extra with your digital images, other than just printing and colouring. Paper piecing, merging with other digis, merging with normal rubber, making your own digital backgrounds, adding text, or in my case creating jewellery from digis. The possibilities are endless, which is why digi stamps are so popular these days. We are by the way sponsored for this spotlight by Stitchy Bear Stamps, just click on the teddy logo below to visit their site. They have very kindly offered a choice of 5 of their digital stamps, and boy do they ever have a huge range to choose from.
image
We are also sponsored by our very own, and very talented Eiglas, who has offered up 3 digis from her range which can be found here.

Goodness me I just realised why my teamies call me Lil Miss Chatterbox, I have been prattling on for 3/4 of a page and not gotten down to the nitty gritty yet. Soooooo without further boring you to sleep or before you switch off, my project.

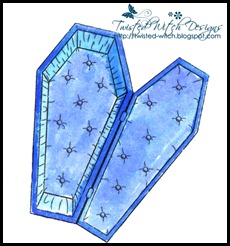
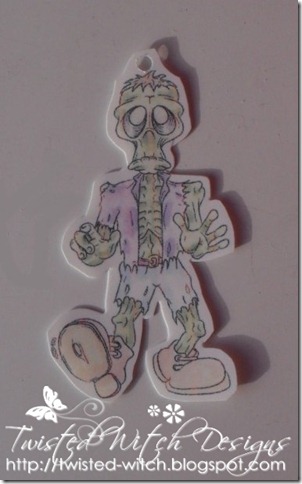
So I printed out 4 digis from Just Inklined and then coloured them in with various DIs. The following pictures are after I scanned them back into my pc. Bat1 bub1 coffin1 pumpkin1 I then copied them and pasted them enough times to print out on one sheet of shrink plastic, but before doing so I lightened them as shrink plastic will deepen your colours as it shrinks. I flipped the image of Bub on one of the copy and pastes so that the earrings would be opposite and look like a pair rather than two left earrings.
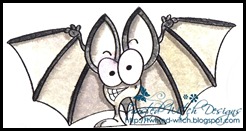
Having waited, as instructed, for the sheet to dry I then trimmed them out,  remembering to punch a hole for attaching them, (here is Bub  ready to shrink) Bub Pre-shrunk1and shrunk them with my heat gun, before turning the finished items into jewellery.
The finished ensemble:-
 Ensemble1Close up of the earrings.   Earrings1Close up of the bracelet
Bracelet.1
I decided to make a little card to go with the jewellery as they are a present for my great niece for wearing on Halloween night.

For this I downloaded a colouring page and removed a few of the elements as it was already quite busy, and then using the merge technique in Paint I merged the precoloured digis into the background and printed it out again. This time I coloured the other areas with promarkers, and finished off with some DI for the sky. I made it up into a card with a lovely halloween themed page I downloaded free from Bearly Mine Designs, with all halloween text on it.

I am entering this into the following challenges:-
Creative Inspirations – Halloween
A Spoon Full of Sugar – Boo
My Time to Craft – Ghosties and Ghoulies and  Long Legged Beasties
Creative Inspirations Wednesdays Challenge Blog – Spooky
Stampin’ For The Weekend – Halloween/Fall
By The Cute and Girly – spooky
Stamp Something – October Digi Day

I enjoyed this immensely, once I had all the hastle out of the way, lol

Don’t forget to check out the CCM blog for more inspirations and indeed to enter into the fun and the chance to win some digis.
Butterfly 2 Signature Lin

Saturday, 23 October 2010

The last of the samples from Sheena’s last show

Sorry folks. Meant to blog these last week, but I have been taking advantage of awaiting some supplies for a CCM project and a lull in things to do by redesigning my blog? What do you think??? I am really pleased with it. The backgrounds were all designed for me by a friend in Italy who I believe will be setting up in business as a blog designer. Mine is the first blog she has designed for and I am both thrilled and flattered that I get to try out her first one. I am loving my new look, very purple, very me.

I shall be putting links to her design blog once she is up and running.

So now back to the samples.

Leaves 1

This first one was shown on the show on Tuesday. Using Sheena’s own embossing powders I randomly stamped a background of the oak leaf (I think?) and the other one….. sorry but nature is not my strong point, lol I then stamped four of the leaves onto acetate and using double sided adhesive film applied gilding flakes to the backs. I thought the effect was quite good until Sheena blew me away with that gorgeous sample she did with mica powders on acetate!

The next one also came from the leaf plate and I coloured them with distress inks to give an autumnal feel. I love the sentiment here as autumn leaves really are as beautiful as a lot of summer flowers, with all the range and shades of great reds, russets and golds. Again this is stamped and embossed with the Wow powders, this time in gold sparkle.

The BP is also basic grey but not the stella ruby, although the stripes do look similar lol. There is a mat beneath the image layer which I embossed onto shimmer red paper.

Autumn Flat

The next one is from the branches set and I coloured it up to look like cherry blossom using DIs, and dotted some flowers that I cut from some lace ribbon and also added some cherry blossoms from Wild Orchid Crafts. The papers are again Basic Grey and the background has been overstamped with the flourishes plate which was with the second set of three stamps on C&C.

Blossom Flat

The final sample comes from the poppy plate again. As soon as I saw the stamp I thought of the gorgeous K&Co Blue Poppy papers and decided to go with blue. I stamped it and embossed it with the Black Glint and have colured it in with cosmic shimmers. Depending on how the light catches it the flowers go from blue to a gorgeous green. I edged the image with lace and turned it into an easel with the beautiful sentiment and a couple of flowers on the lower layer.  Again this one was aired but didn’t get opened up fully which was a shame as the sentiment is lovely.Blue Poppies Full

Assuming I can get my errant printer to behave itself, which is sadly looking unlikely at the moment, please check back on Monday to see the latest CCM challenge. We have a great Guest Designer at CCM for Monday’s spot, someone whose colouring is top notch and her eye for detail is fantastic.

Butterfly 2 Signature Lin

Monday, 18 October 2010

Final sneaky peek for tomorrow’s show

Here is my last sneaky peek card for Sheena’s show tomorrow and I am being dead cheeky and also entering this in the Stampman Challenge no 7 ‘Autumn’. I did actually make this one with that challenge in mind but have not been able to blog it before now because naturally it was for Sheena’s show tomorrow! I hope neither The Stampman, nor Sheena mind the crossover?!?

Red Poppy  Easel

Here I have used the new poppy stamp from Sheena’s ‘A Little Bit Sketchy’ range, which comes in a bundle with the twisty tree and flourish stamps.

I made the background paper myself from a large 12x12 Basic Grey Sheet from the Stella Ruby collection. It started off life looking like this

Stella Ruby before

I chopped it down to 6x6 and then went around the edges with Tattered Rose and Barn Door DIs. I then gave the whole thing a generous mist with Glimmer Mists in Starfish and Rose Tea. After giving it a bit of a blast to dry it out I turned my attention to distressing it with the flourish stamps, which I stamped and then embossed with the gold sparkle Sheena Wow embossing powders. Before finally roughing up the edge and edging with the same powders. You can see that in a couple of places I did catch the edge of the stamp, and ordinarily I would have started again, but as I was going for a well grungy distressed look I decided it added to the charm of the piece (that’s my story and I’m sticking to it!)

I stamped up the poppy and embossed with the plain gold powders and coloured it in with Cosmic Shimmer paints.  I roughly went around the edges of the flowers with tattered rose DI and dabbed on some Glimmer mist in a combination of the two colours on the BP and then chopped it out with a nestie.

Keeping the nestie in place I used a versamark pen to highlight the beading and tossed on some gold sparkle embossing powder.

A plain red mat and some gold ribbon finished it off. I didn’t add any extra embellishments to it because I thought it would detract from the image and cover up the background I had created.

As I mentioned above I am entering this for The Stampman’s current challenge, as poppies are so evocative of Autumn because each November we are reminded of their beauty as we all wear our poppies with pride to signify Armistice Day, when we remember our heroes who have fallen in the two world wars and other major conflicts.

I do have a couple more samples to share with you, but I will blog those after the shows tomorrow.

More samples can be found on Sheena’s blog here and Vicky’s blog here

Don’t forget to tune in tomorrow at 8am and 12 lunchtime to catch Sheena demonstrating her gorgeous new stamps in person.Butterfly 2 Signature Lin

CCM 32 Use A Freebie

If you are like me, you keep all the freebies that come on your monthly magazines, intending to perhaps use them in the future, but you just have so much other gorgeous stash that needs to be used that the freebie pile grows ever bigger and bigger and never gets used. So this challenge was perfect to get me motivated into using some of it.CCM 32 Use A Freebie-

I had spotted the lovely papers I have used in Card Making and Papercraft and straight away they really spoke to me, but they got pulled out and filed, as usual. So when we were asked to create a project made from a freebie I went looking for these immediately.

I also had these little fairy stamps filed again from CMP. I noticed several comments on these fairies on various forums about the fact that they were pretty but ruined by their faces! Awwwww poor fairies!

I stamped this one onto centura pearl cardstock and embossed her in gold detail powder.

I coloured her in with a big n juicy inkpad, but used scattered straw DI for her wings and spun sugar DI for her skin.

Sadly the only freebie flowers I had were not nice enough for this, and/or the wrong colours so I did use flowers from my stash, but the ribbons came wrapped round some chocolates I had been given a couple of years back. I am STILL trying to work out how to incorporate lush brown ribbon with the logo ‘Lily O’Brien’ on it into a project! LOL

Don’t forget to pop on over to Crafty Cardmakers and join in with the challenge. The prize this fortnight is a couple of gorgeous Crafty Individual paper packs. Whilst you are there, the Fancy Folds spotlight is still running for another week, so why not have fun with that, or maybe you can incorporate both ideas into one project?

And don’t forget your remit is to use a FREEBIE, that means something that came free with something, ie, magazine etc. NOT a gift someone else gave you! The idea is to get you using up your stash of free goodies that come with your monthly magazines and the like.

I am looking forward to checking out your entries and seeing how inventive you all are.

Butterfly 2 Signature Lin

LinkWithin

Related Posts with Thumbnails